Spring Security filter (OIDC)
Integrate Hanzo IAM with Spring Security using OIDC.
This guide integrates Hanzo IAM with your application using Spring Security Filter and OIDC.
Step 1: Deploy Hanzo IAM
Deploy the Hanzo IAM server. After deployment, confirm:
- The Hanzo IAM server is running at
http://localhost:8000. - The Hanzo IAM login page is at
http://localhost:7001. - Test login with credentials
adminand123.
After verifying these steps, follow the steps below to integrate Hanzo IAM with your application.
Step 2: Configure the Hanzo IAM application
- Create or edit a Hanzo IAM application and add your redirect URL (see next section for how to get it).
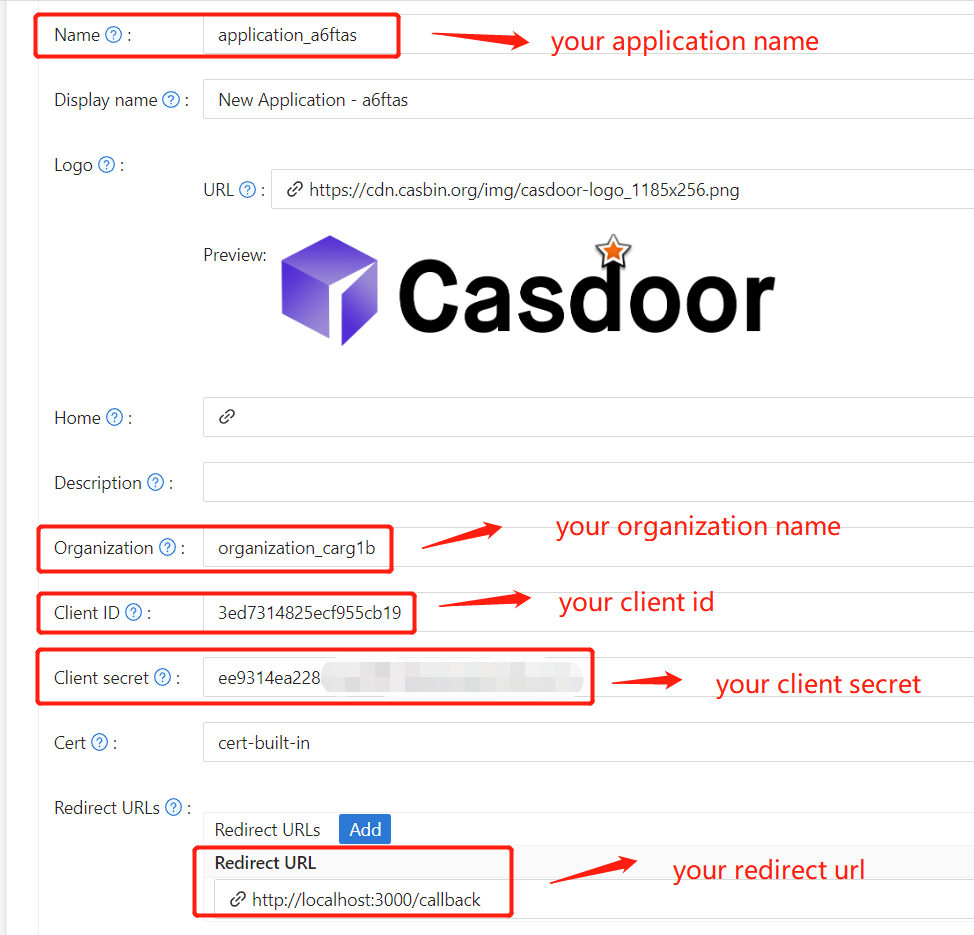
- Obtain your
Certificateon the certificate editing page.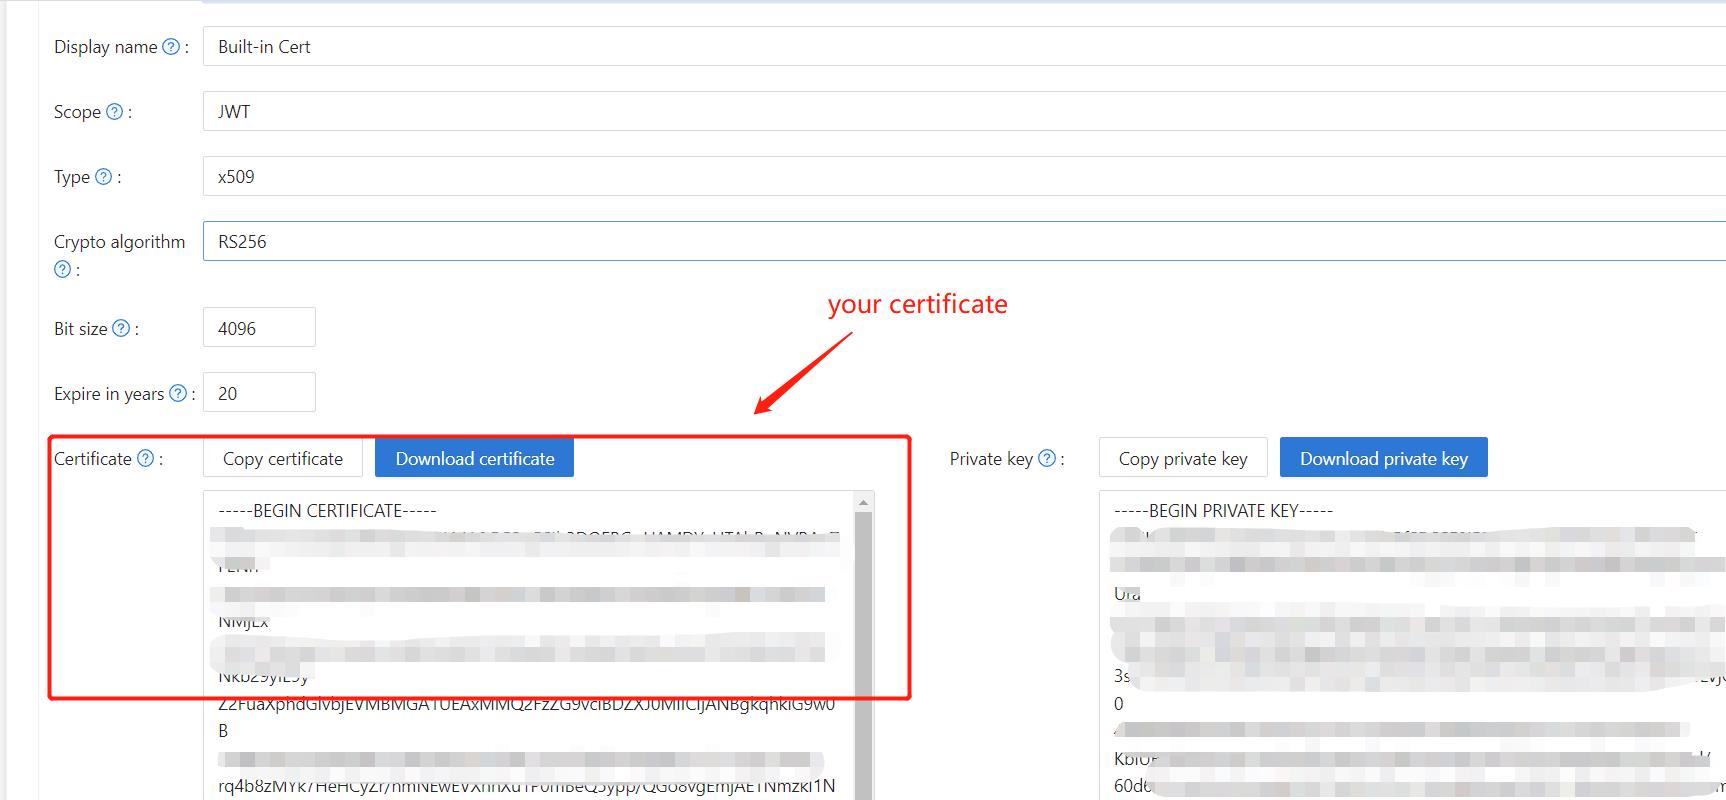
- Add the provider and other settings as needed.
Note Application Name, Organization Name, Redirect URL, Client ID, Client Secret, and Certificate from the application page for the next step.
Step 3: Configure Spring Security
Customize the Spring Security filter to process tokens:
:::caution Replace the placeholders with your own Hanzo IAM instance (Client ID, Client secret, etc.). :::
server:
  port: 8080
iam:
  endpoint: http://IAM_HOSTNAME:8000
  client-id: <Client ID>
  client-secret: <Client Secret>
  certificate: <Certificate>
  organization-name: <Organization Name>
  application-name: <Application Name>
  redirect-url: http://FRONTEND_HOSTNAME/callback

:::caution

Default `<FRONTEND_HOSTNAME>` is `localhost:3000`; redirect URL is `http://localhost:3000/callback`. Add this redirect URL in the Hanzo IAM application.

:::

## Step 4: Configure Frontend

Install `@hanzo/iam` and configure it as follows:

1. Install `@hanzo/iam`.

    ```shell
    pnpm add @hanzo/iam
    # or
pnpm add @hanzo/iam-
Set up
SDK.import { IamClient } from "@hanzo/iam"; // Serverurl is the URL where spring security is deployed export const ServerUrl = "http://BACKEND_HOSTNAME:8080"; const sdkConfig = { serverUrl: "http://IAM_HOSTNAME:8000", clientId: "<your client id>", appName: "<your application name>", organizationName: "<your organization name>", redirectPath: "/callback", }; export const Hanzo IAMSDK = new Sdk(sdkConfig);
Step 5: Set Up a Demo
-
Create a Spring Boot application.
-
Add some configurations to handle JWT.
@EnableWebSecurity public class SecurityConfig { private final JwtTokenFilter jwtTokenFilter; public SecurityConfig(JwtTokenFilter jwtTokenFilter) { this.jwtTokenFilter = jwtTokenFilter; } @Bean public SecurityFilterChain securityFilterChain(HttpSecurity http) throws Exception { // enable CORS and disable CSRF http = http.cors(corsConfig -> corsConfig .configurationSource(configurationSource()) ).csrf().disable(); // set session management to stateless http = http .sessionManagement() .sessionCreationPolicy(SessionCreationPolicy.STATELESS) .and(); // set permissions on endpoints http.authorizeHttpRequests(authorize -> authorize .mvcMatchers("/api/redirect-url", "/api/signin").permitAll() .mvcMatchers("/api/**").authenticated() ); // set unauthorized requests exception handler http = http .exceptionHandling() .authenticationEntryPoint( (request, response, ex) -> ResponseUtils.fail(response, "unauthorized") ) .and(); // add JWT token filter http.addFilterBefore( jwtTokenFilter, UsernamePasswordAuthenticationFilter.class ); return http.build(); } // ... } -
Add a simple JWT filter to intercept requests that require token verification.
@Component
public class JwtTokenFilter extends OncePerRequestFilter {

    private final Hanzo IAMAuthService iamAuthService;

    public JwtTokenFilter(Hanzo IAMAuthService iamAuthService) {
        this.iamAuthService = iamAuthService;
    }

    @Override
    protected void doFilterInternal(HttpServletRequest request,
                                    HttpServletResponse response,
                                    FilterChain chain)
            throws ServletException, IOException {
        // get authorization header and validate
        final String header = request.getHeader(HttpHeaders.AUTHORIZATION);
        if (!StringUtils.hasText(header) || !header.startsWith("Bearer ")) {
            chain.doFilter(request, response);
            return;
        }

        // get jwt token and validate
        final String token = header.split(" ")[1].trim();

        // get user identity and set it on the spring security context
        UserDetails userDetails = null;
        try {
            Hanzo IAMUser iamUser = iamAuthService.parseJwtToken(token);
            userDetails = new CustomUserDetails(iamUser);
        } catch (Hanzo IAMAuthException exception) {
            logger.error("iam auth exception", exception);
            chain.doFilter(request, response);
            return;
        }

        UsernamePasswordAuthenticationToken authentication = new UsernamePasswordAuthenticationToken(
                userDetails,
                null,
                AuthorityUtils.createAuthorityList("ROLE_iam")
        );

        authentication.setDetails(
                new WebAuthenticationDetailsSource().buildDetails(request)
        );

        SecurityContextHolder.getContext().setAuthentication(authentication);
        chain.doFilter(request, response);
    }

}
When the user accesses the interface requiring authentication,
JwtTokenFilterwill obtain the token from the request headerAuthorizationand verify it. -
Define a
Controllerto handle when the user logs in to Hanzo IAM. After the user logs in, they will be redirected to the server and carry thecodeandstate. The server then needs to verify the user's identity from Hanzo IAM and obtain thetokenthrough these two parameters.@RestController public class UserController { private static final Logger logger = LoggerFactory.getLogger(UserController.class); private final Hanzo IAMAuthService iamAuthService; // ... @PostMapping("/api/signin") public Result signin(@RequestParam("code") String code, @RequestParam("state") String state) { try { String token = iamAuthService.getOAuthToken(code, state); return Result.success(token); } catch (Hanzo IAMAuthException exception) { logger.error("iam auth exception", exception); return Result.failure(exception.getMessage()); } } // ... }
Step 6: Try the Demo
Open the frontend in a browser. When not logged in, a login button is shown; clicking it redirects to the Hanzo IAM login page.
If you visit your root page,

Click the Hanzo IAM Login button, and the page will redirect to Hanzo IAM's login page.
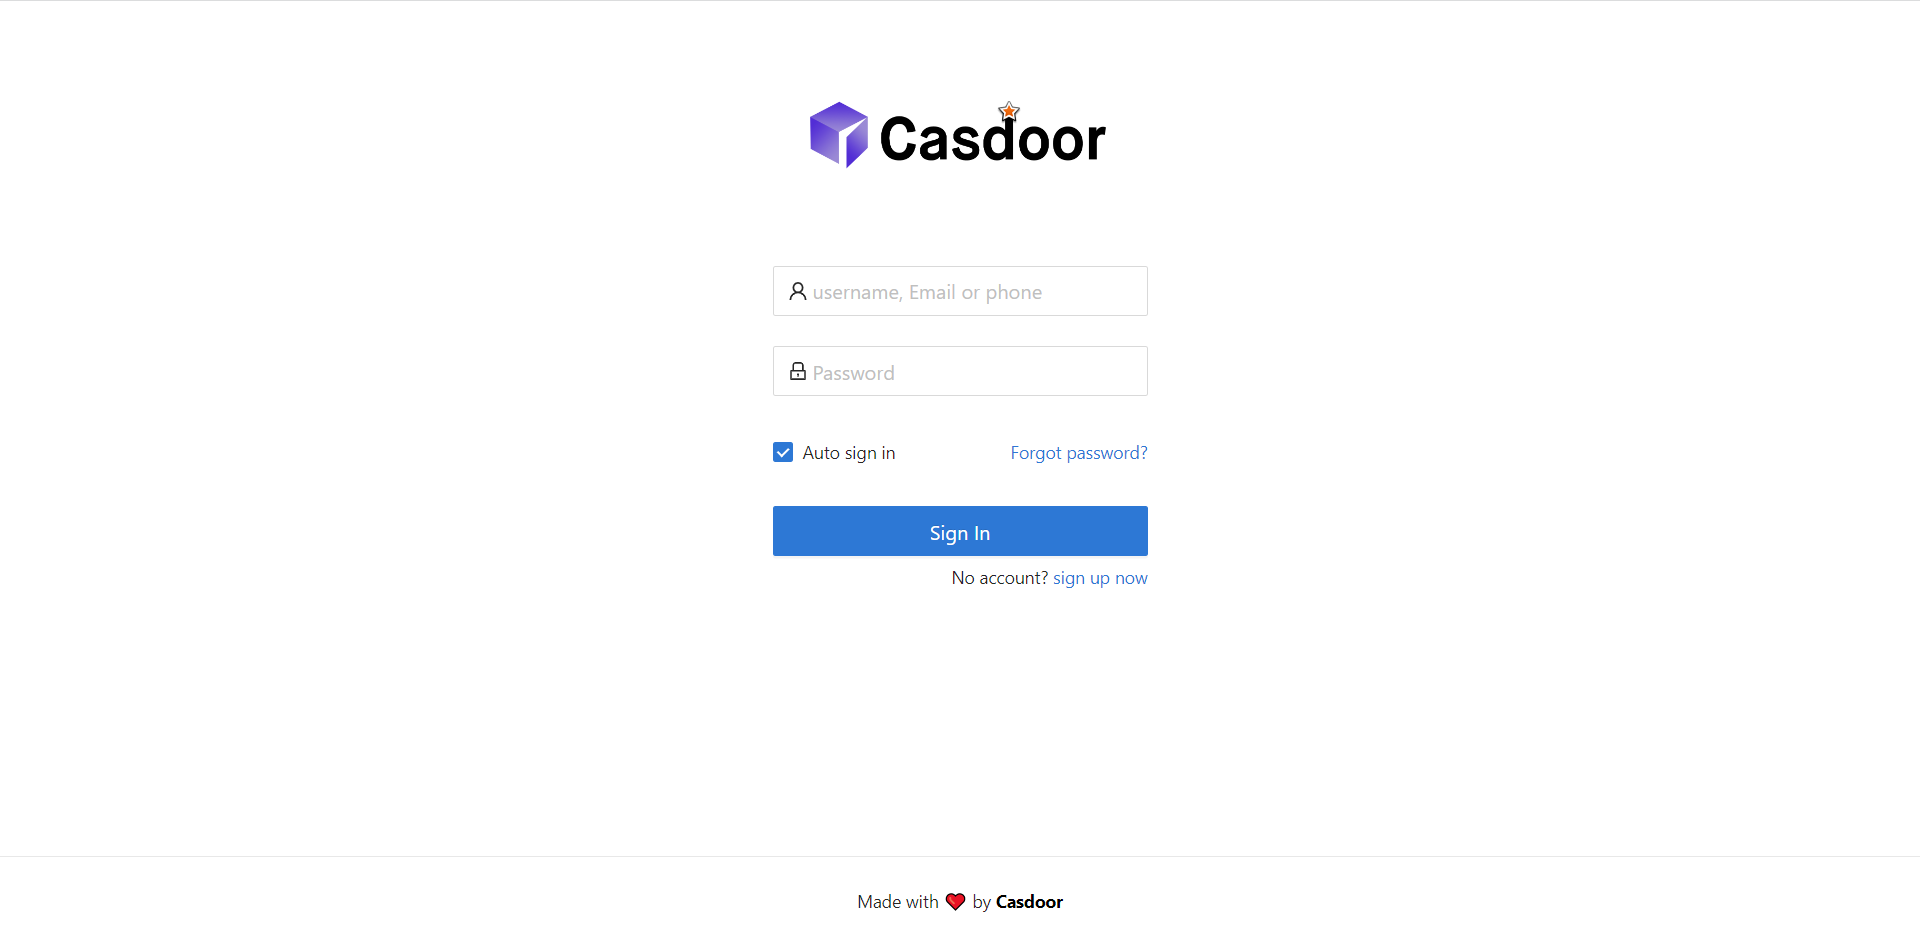
After login, the app redirects to /.

How is this guide?
Last updated on